Why is Pilates Exercise suited to the Equestrian Athlete? - Axial Elongation
“Pilates: a system of exercises using special apparatus, designed to improve physical strength, flexibility, and posture, and enhance mental awareness” ` The Oxford Dictionary 2013
Horse riding requires muscular endurance, spinal stability and mobility dependant on the phase of gait of the horse, control and co-ordination of muscular activation and ultimately awareness of the rider’s body and the rider’s influence on the horse’s movement.
Pilates and in particular EQUESTRIAN PILATES® address these requirements in full. So why wouldn’t you investigate how these exercises can assist you in becoming a better rider.
Over the next few months I will introduce to you each Pilate’s principle and explain how they relate to the Equestrian Athlete and provide a simple exercise for you to try that addresses this principle.
3. Pilates Principle: Axial Elongation
Axial Elongation: refers to the position of our spine and its ability to absorb forces placed on our body allowing for greater mobility or stability dependant on those forces. Or in more basic terms ‘Posture’.
Axial Elongation places the body in its optimal position to increase available degrees of freedom and increase efficiency of movement. – Polestar Pilates™ Manual - Principles of Movement 2008

There are 4 common types of posture;
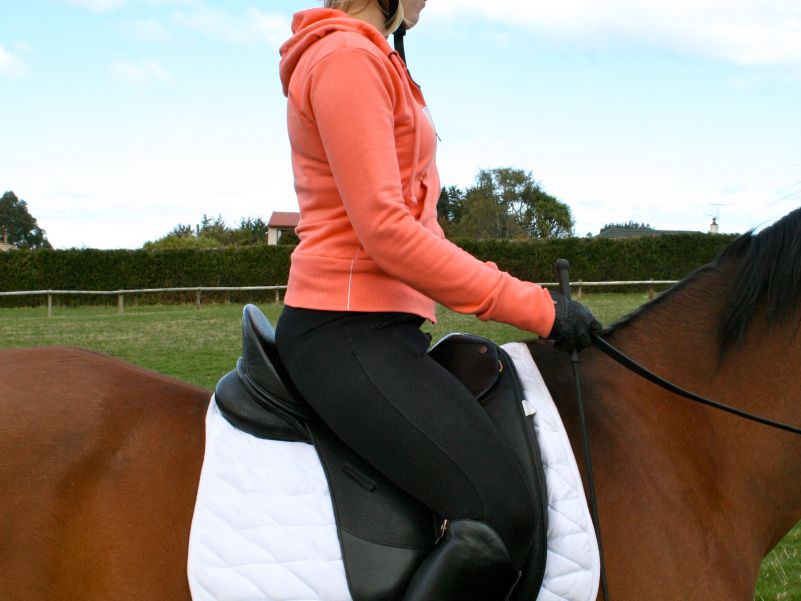
 Ideal: a ‘plumb line’ from ceiling to floor with the head square over shoulders, shoulders over hips, hips over knees & knees over the toes. From the side, sitting in the saddle the ear, shoulder, bottom rib, hip and heel aligned. The spine is in a ‘neutral’ position, with a small concave curve in the upper back and a small convex curve in the lower back.
Kyphosis/lordosis: This posture can vary between both kyphosis and lordosis and can also appear independently of one another.
 Kyphosis – a rounded shoulder/forward upper back position. The upper chest is closed, collapsed and tight and the upper back is overstretched and weak.
What ‘in the saddle’ issues may occur?
This position will generally make a rider appear ‘top heavy’. The rider will ‘tip forward’ and carry their body weight in front of the hips. This will often tip the horse onto the forehand. This posture means that it is difficult for the rider to open the chest and sit tall as the muscles in the upper back are weak therefore the upper back is often sore following riding. This posture usually means that the rider will have short hamstrings. This limits the amount of freedom and length at the leg and hip, making it difficult to open the hip, often the knee and leg will grip the horse instead and block the horses forward movement. If the rider is tilted or slumped forward in the saddle the core isn’t doing a lot of work and the lungs and ribs are compressed so breathing becomes more difficult and there is a tendency for the rider to breathe into the upper back, chest and shoulders giving the appearance of hunched shoulders.
 Lordosis – an excessive curve in the lower back, the derriere appears to stick out as does the chest. Tightness is often found in the lower back, front of the hips and the abdominals are generally weak and have poor tone.
What ‘in the saddle’ issues may occur?
In this position the chest is generally thrust forward to some degree and the derrière sticks out – the rider’s weight then sits forward on the pubic bone at the front of the saddle, the tummy pops out as do the ribs. This position places more force on the lower segments of the spine especially around L3-5, meaning that the force absorption of this posture is poor and will often cause tightness and pain in the lumbar spine. The hip flexors are shortened in this position and this makes it harder for the leg to move freely at the hip and almost impossible to open the hip angle to allow pressure to be placed from the leg to the horse, this also tends to mean that the weight is forward of the horses centre of gravity and similar to the above posture will cause the horse weight to be on the forehand. Abdominal strength is generally very poor in this position and tone is lacking, this makes it very difficult for the rider to sit tall or control the position of their seat.
 Flat Back: as the name suggests there is little to no natural curvature of the whole spine. Tightness is often found in the hamstrings & gluteals and the spine doesn’t move freely giving the appearance of tension especially in the chest & shoulders.
What ‘in the saddle’ issues may occur?
In this position the low back is generally tight and as there is no natural curvature in the spine then the forces are less able to be absorbed throughout the spine, instead concentrating in one area – often at the seat/tailbone. Hamstrings are often tight and this limits the length of the leg in the saddle which then limits independent movement of the hip. The shoulders and chest can be tight and the upper back tending towards kyphosis. Ultimately this position gives the appearance of ‘rigidity’ and the rider will ‘bounce’ more in the saddle, inhibiting the horses movement.
 Sway Back: the low lumbar area is flattened and the mid back is rounded in this posture, with the shoulders often appearing to sit behind the hip. The knees and hips are usually hyperextended and the rectus abdominis and hamstrings are dominant with a flat appearance of the buttocks. The upper chest is also closed and tight and the upper back weak.
What ‘in the saddle’ issues may occur?
This position will often mean the rider has a tight low back and hamstrings. The buttocks are flat in appearance and don’t do a lot to assist the rider, therefore affecting the mobility and stability of the pelvis and the seat itself. The rider will often sit in the back of the saddle and grip with the knees for balance meaning that the heels will rise. The shoulder will often sit behind the angle of the hip and the upper back in a rounded posture so the chest and shoulders will often be tight. The rider will overuse the rectus abdominals and ‘suck in’ the tummy rather than engage the deeper abdominal stabilisers and exacerbating the ‘tucked’ position of the pelvis and the gripping of the knees.
“By facilitating awareness of optimal alignment we can decrease stresses to compromised structures of the body.” – Polestar Pilates™ Manual - Principles of Movement 2008
It is important to note that nobody will exhibit a perfect posture… instead it is important to become aware of your posture type and the recognise the areas of tightness, weakness & strength that come from this posture and the way that this posture will affect your riding, then begin to work on improving these areas to create a more balanced axial alignment.
So how do you improve your Axial Elongation?
Once you have worked with your movement specialist to determine which posture you have, there are many Pilates exercises that will assist in improving your spinal mobility, stability and control. The below exercise is but one that will ultimately increase the mobility of your spine assisting in developing suppleness, strength & flexibility allowing your to evenly distribute and absorb the forces applied to the spine through the movement of the horse.
Shoulder Bridge


Set Up:
Lying on your back, feet on the mat, toes & heels aligned with the hips, in a neutral spine position and the deep core engaged throughout the movement. Shoulders drawn back and down, chin tucked in.
- Breathe out to tuck the bottom, flattening the spine into the mat. Curling the spine up from the mat a single vertebrae at a time until you come to rest between the shoulder blades.
- Breathe in to hold the position lengthening the knees over the toes, lengthening the spine and ensuring that both feet have even pressure between the toes & heels.
- Breathe out to soften the chest bone peeling the upper back, mid back and then low back onto the mat a single vertebrae at a time, returning to a neutral spine position.
- Repeat 5 times – take note of the areas of the spine that you find move easily and those that are ‘stuck’ or difficult to move through.
The Aim;
During this exercise we aim to move each segment of the spine individually, if you noticed that particular sections of the spine moved as a group or there felt like there were flat spots, these are the areas of your spine that do not absorb force. Therefore work back and forwards through this ‘stuck’ area aiming to release it. We are also aiming to maintain stability of the whole body during this exercise, be aware of the pelvic position – if one side has sunken then you are overusing one side of your body – utilising the core and being aware of your foot pressure will assist in evening the pelvis.
“Good posture can be successfully acquired only when the entire mechanism of the body is under perfect control. Graceful carriage follows as a matter of course.” ~ J.Pilates
Laura DawsonPilates Co-ordinator & Instructor BPhEd, Certified Polestar Studio Practitioner, Back In Motion Certified Practitioner, REPs Registered Personal Trainer & Group Exercise Instructor, EQUESTRIAN PILATES® Certified Practitioner